Diagnosing Common Car Problems on the Roadside: A Troubleshooting Guide

Introduction: Roadside Car Trouble and Basic Diagnostics
Alright folks, let's face it. Nobody wants to be stranded on the side of the road with a sputtering engine or a flat tire. It's stressful, potentially dangerous, and definitely inconvenient. But hey, things happen! That's why knowing how to diagnose some common car problems yourself can be a real lifesaver. This isn't about becoming a master mechanic on the fly; it's about having the knowledge to assess the situation, potentially fix a minor issue, or at least accurately describe the problem to a tow truck driver. Think of it as roadside triage for your vehicle.
Essential Tools for Roadside Car Diagnostics and Repair
Before we dive into specific problems, let’s talk tools. Having a basic roadside emergency kit is paramount. This isn't just about a spare tire and jack; it's about having the right tools to diagnose and potentially fix minor issues. Here’s a list of essentials:
- Spare Tire (Inflated): Obvious, but check the pressure regularly!
- Jack and Lug Wrench: Make sure you know how to use them properly. Practice in your driveway!
- Jumper Cables: A dead battery is a common culprit.
- Basic Toolkit: Screwdrivers (Phillips and flathead), pliers, adjustable wrench, socket set.
- OBD II Scanner: (More on this later) This little gadget can read your car's error codes.
- Multimeter: For testing electrical circuits. Don't be intimidated; there are plenty of tutorials online.
- Flashlight or Headlamp: Essential for working in the dark.
- Gloves: Protect your hands from grease and grime.
- Rags or Paper Towels: For cleaning up messes.
- Duct Tape: The ultimate fix-it solution (for temporary repairs, of course).
- WD-40: For loosening rusted bolts and hinges.
- Emergency Warning Triangle or Flares: To alert other drivers to your presence.
- First Aid Kit: Just in case.
Diagnosing a Dead Battery: Jumper Cables and Battery Testers
A dead battery is arguably the most common roadside problem. Symptoms include a clicking sound when you turn the key, dim headlights, or absolutely no response at all. Here’s how to diagnose and (hopefully) fix it:
- Visual Inspection: Check the battery terminals for corrosion. If they're covered in white or bluish deposits, clean them with a wire brush and baking soda solution.
- Jumper Cables: The classic solution. Make sure you connect the cables in the correct order (positive to positive, negative to ground on the disabled vehicle). Let the donor car run for a few minutes before attempting to start the dead car.
- Battery Tester: A simple battery tester (available at most auto parts stores for around $20) can give you a quick reading of your battery's voltage. A healthy battery should read around 12.6 volts. Anything significantly lower indicates a problem.
Product Recommendations:
- NOCO Boost Plus GB40 1000 Amp 12-Volt UltraSafe Lithium Jump Starter Box: This is a portable jump starter, meaning you don't need another car. It's compact, powerful, and relatively easy to use. It typically retails for around $100. Use case: Ideal for anyone who wants a reliable jump-starting solution without relying on another vehicle.
- Clore Automotive Jump-N-Carry JNC660 1700 Peak Amp 12-Volt Jump Starter: A more heavy-duty jump starter, suitable for larger vehicles. It's more expensive (around $200) but offers more power and longer run time. Use case: Perfect for trucks, SUVs, and vehicles with larger engines.
- ANCEL BA101 Car Battery Tester 12V 100-2000 CCA Battery Load Tester Digital Automotive Alternator Analyzer: A basic but reliable battery tester. Easy to use and provides essential information about your battery's health. Around $30. Use case: Quick and easy battery health check.
Product Comparison: The NOCO Boost is more portable and user-friendly, while the Clore Automotive Jump-N-Carry offers more power. The ANCEL BA101 is a simple tester that's great for basic battery health checks. Consider your vehicle type and budget when choosing.
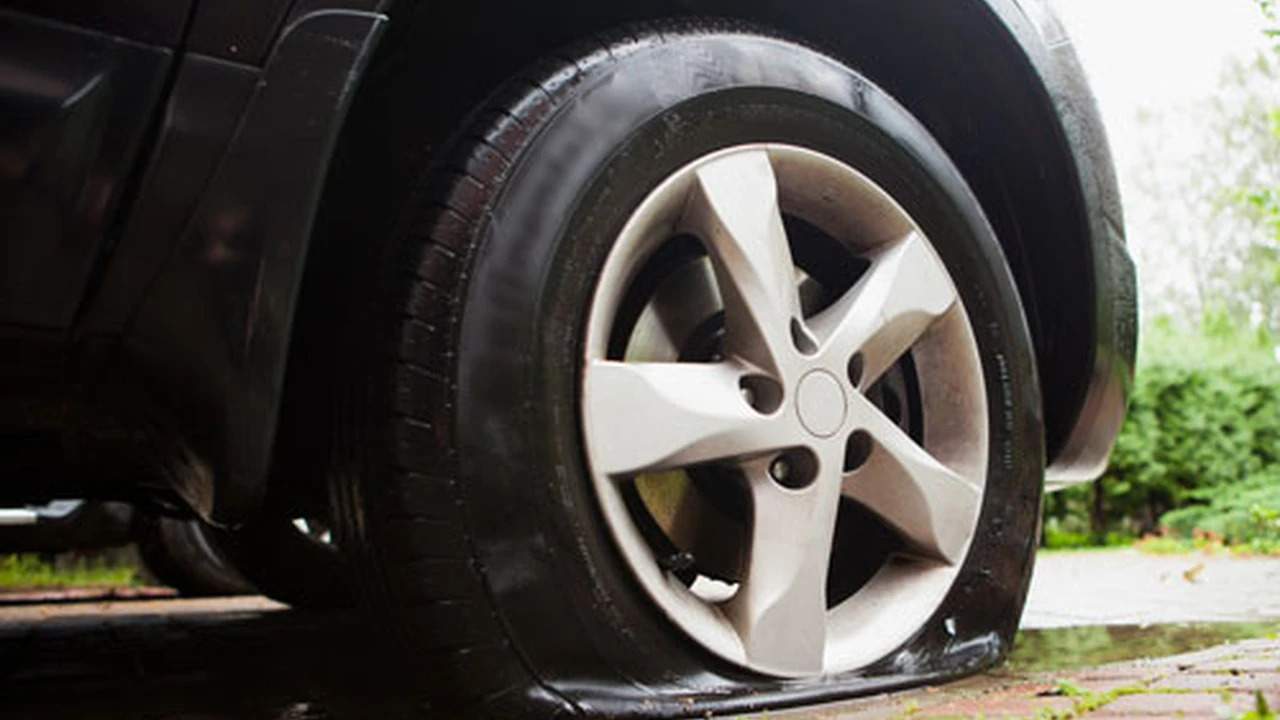
Dealing with Flat Tires: Changing a Tire Safely and Efficiently
Flat tires are another common roadside headache. Knowing how to change a tire safely and efficiently is a crucial skill. Here's a step-by-step guide:
- Safety First: Pull over to a safe location, away from traffic. Turn on your hazard lights. Place warning triangles or flares behind your vehicle.
- Gather Your Tools: Spare tire, jack, lug wrench, owner's manual (to locate jacking points).
- Loosen the Lug Nuts: Before jacking up the car, loosen the lug nuts on the flat tire. Don't remove them completely, just break them free.
- Jack Up the Car: Consult your owner's manual for the correct jacking points. Place the jack securely and raise the car until the flat tire is off the ground.
- Remove the Lug Nuts: Now you can completely remove the lug nuts. Keep them in a safe place.
- Remove the Flat Tire: Carefully pull the flat tire off the hub.
- Mount the Spare Tire: Align the spare tire with the wheel studs and push it onto the hub.
- Install the Lug Nuts: Tighten the lug nuts by hand, in a star pattern (opposite nuts first).
- Lower the Car: Lower the car until the spare tire is touching the ground, but not fully supporting the weight.
- Tighten the Lug Nuts: Now, fully tighten the lug nuts with the lug wrench, again in a star pattern.
- Lower the Car Completely: Lower the car completely and remove the jack.
- Final Tightening: Give the lug nuts one last tightening check.
- Stow the Flat Tire and Tools: Secure the flat tire and tools in your vehicle.
- Check Tire Pressure: Inflate the spare tire to the correct pressure (check the sticker on your driver's side doorjamb or your owner's manual).
- Get Your Flat Tire Repaired or Replaced: Spare tires are usually temporary. Get your flat tire repaired or replaced as soon as possible.
Overheating Engine: Identifying the Cause and Potential Solutions
An overheating engine is a serious problem that can cause significant damage. Symptoms include a rising temperature gauge, steam coming from under the hood, and a sweet smell (antifreeze). Here's what to do:
- Pull Over Immediately: Find a safe place to pull over and turn off the engine.
- Let the Engine Cool Down: Do NOT open the hood immediately. Wait at least 30 minutes to allow the engine to cool down.
- Check Coolant Level: Once the engine has cooled down, carefully open the coolant reservoir (using a rag to protect your hand from any residual steam). Check the coolant level. If it's low, add coolant (or water, in an emergency) until it reaches the "full" mark.
- Check for Leaks: Inspect the radiator hoses, water pump, and radiator for any signs of leaks.
- Check the Radiator Fan: Start the engine and see if the radiator fan is running. If it's not, there may be a problem with the fan motor or a sensor.
Possible Causes:
- Low Coolant Level: The most common cause.
- Leaking Coolant Hose: A visual inspection should reveal this.
- Faulty Thermostat: The thermostat regulates coolant flow.
- Bad Water Pump: The water pump circulates coolant.
- Clogged Radiator: Debris can block the radiator's cooling fins.
- Faulty Radiator Fan: The fan helps cool the radiator.
OBD II Scanners and Decoding Error Codes: A Modern Diagnostic Tool
Your car's onboard computer constantly monitors various systems. When it detects a problem, it stores an error code (also known as a Diagnostic Trouble Code or DTC). An OBD II scanner can read these codes and provide valuable information about the issue.
- Plug in the Scanner: Locate the OBD II port (usually under the dashboard). Plug in the scanner.
- Turn on the Ignition: Turn the ignition key to the "on" position (but don't start the engine).
- Read the Codes: Follow the scanner's instructions to read the stored codes.
- Interpret the Codes: The scanner will display the codes (e.g., P0301 - Misfire Detected Cylinder 1). You can then look up the meaning of the code online or in a repair manual.
Product Recommendations:
- BlueDriver Bluetooth Pro OBDII Scan Tool: A popular and highly rated Bluetooth scanner that connects to your smartphone. It provides detailed code definitions, repair reports, and access to a large database of information. Around $120. Use case: Comprehensive diagnostics and repair information.
- Autel MaxiCOM MK808 OBD2 Diagnostic Scanner: A more advanced scanner with a larger screen and more features, including bidirectional control (the ability to send commands to the car's computer). Around $500. Use case: More in-depth diagnostics and advanced features for experienced users.
- FOXWELL NT301 OBD2 Scanner Professional Enhanced OBDII Diagnostic Code Reader: A budget-friendly option that provides basic code reading and clearing capabilities. Around $60. Use case: Simple and affordable code reading for basic diagnostics.
Product Comparison: The BlueDriver offers a good balance of features and price, while the Autel MaxiCOM is a more powerful tool for advanced users. The FOXWELL NT301 is a great option for those on a budget.
Recognizing and Addressing Common Warning Lights
Your dashboard warning lights are there for a reason! Ignoring them can lead to serious problems. Here are some of the most common warning lights and what they mean:
- Check Engine Light: Indicates a problem with the engine or emissions system. Get it checked as soon as possible.
- Oil Pressure Light: Indicates low oil pressure. Pull over immediately and check the oil level.
- Battery Light: Indicates a problem with the charging system.
- Temperature Light: Indicates an overheating engine.
- Brake Light: Can indicate low brake fluid, a problem with the parking brake, or a problem with the braking system.
- Tire Pressure Monitoring System (TPMS) Light: Indicates low tire pressure in one or more tires.
- ABS Light: Indicates a problem with the anti-lock braking system.
Preventative Maintenance: Avoiding Roadside Breakdowns
The best way to avoid roadside breakdowns is to keep your car properly maintained. Here are some key preventative maintenance tasks:
- Regular Oil Changes: Follow the manufacturer's recommended oil change interval.
- Check Fluid Levels: Regularly check and top off coolant, brake fluid, power steering fluid, and transmission fluid.
- Inspect Tires: Check tire pressure and tread depth regularly. Rotate your tires every 6,000-8,000 miles.
- Replace Air Filters: Replace the engine air filter and cabin air filter as needed.
- Inspect Belts and Hoses: Check belts and hoses for cracks and wear.
- Tune-Ups: Follow the manufacturer's recommended tune-up schedule.
- Battery Maintenance: Clean battery terminals and have the battery tested periodically.
Staying Safe While Stranded: Roadside Safety Tips
If you do find yourself stranded on the side of the road, here are some important safety tips:
- Pull Over Safely: Get as far off the road as possible.
- Turn on Hazard Lights: Make sure your hazard lights are flashing.
- Set Up Warning Devices: Place warning triangles or flares behind your vehicle.
- Stay Visible: Wear bright clothing or a reflective vest.
- Call for Help: Call for roadside assistance or the police.
- Stay in Your Vehicle: If possible, stay inside your vehicle with the doors locked.
- Be Aware of Your Surroundings: Pay attention to traffic and other potential hazards.
:max_bytes(150000):strip_icc()/277019-baked-pork-chops-with-cream-of-mushroom-soup-DDMFS-beauty-4x3-BG-7505-5762b731cf30447d9cbbbbbf387beafa.jpg)